Soluble Salts


Mystery solved!! I'd always wondered what that white build up was on the soil of my house plants, and now I know! It's soluble salts: minerals or fertilizers that are dissolved in water, and are left behind to accumulate after normal evaporation of water.

I used to just take a spoon and mix them back into the soil... oops (don't do that!!). Instead you should scoop the whitish and yellowish film off the top of the soil and discard it. Soluble salts that are present in the soil in concentrations that are too high can damage the plant.

Here's some info:

  • Salts form a yellow or white crust at the top of the soil or at the bottom at the drainage holes.
  • They can cause salt toxicity, which can result in reduced growth, brown leaf tips, leaf dropping, wilting, root damage, root rot, reduced water absorption capacity.
  • Prevention: when you water, allow the water to run through soil and drip out of the bottom of the pot, but do not let the plant sit in that water. Empty and clean the drip tray (the salts will be reabsorbed back into the plant if it is allowed to soak up previously dripped water).
  • Every few months, plants should be leached: pour a lot of water on the soil and let it drain completely. Remove any salt crust layer at the top BEFORE leaching so that this salt is not reintroduced to the soil.
  • Salt toxicity happens in house plants because of the low light conditions: lower light results in lower water requirements for the plant, which reduces the opportunity for the excess salt to be leached away or diluted.


Plant Avenue Home

Saving Seeds From A Pumpkin To Plant In The Garden

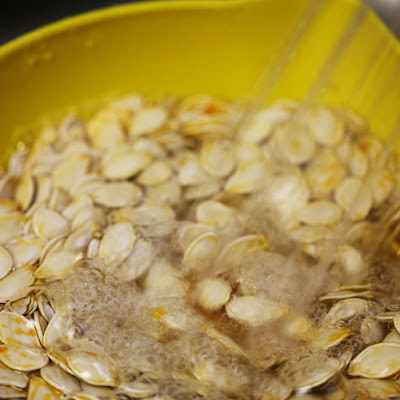
I've never tried planting pumpkins before, and usually on Halloween all the seeds that come out of our store bought pumpkins get roasted and eaten. However this Halloween as I was carving our pumpkins, the wheels in my head were turning: I thought maybe I'd try saving some seeds to grow next year!

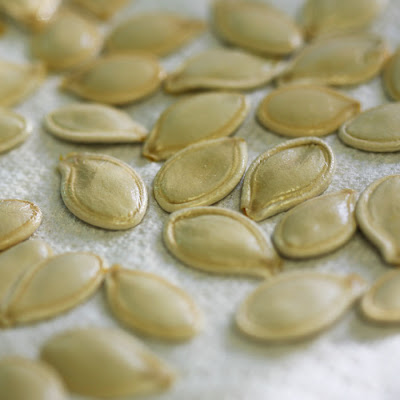
Apparently it's pretty simple - you rinse them off, pat them dry, and then let them cure (i.e. dry thoroughly?) for about a month, before you store them in an envelope.

Sounds good!


Plant Avenue Home

My (Endless ;) Avocado Project

Guess what I found in my compost pile yesterday!! Yet another rooted and sprouted avocado pit. I brought this one indoors this time, instead of planting it and leaving it out do die in our cold winter. It doesn't get that cold where I am (Vancouver, BC), just too cold for avocados, apparently.

I brought this one inside and gave it a good bath, to get any critters off. At the moment it's sitting in water on my kitchen counter, waiting for me to have a moment to plant it in a pot with indoor potting soil (I'll probably do this later today). Meanwhile here are some pics so you can see :)


Plant Avenue Home

How To Extract Marigold Seeds

I wrote an earlier post about how to get next year's seeds from dried Marigold flowers, but now I actually have pictures, so I thought I'd post about it again:

1) Pick the dead flowers from the plant and put them somewhere to dry completely.
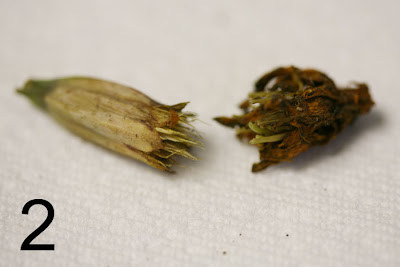
2) Separate the top and bottom portion.
3) Open up the bottom portion to reveal the seeds.
4) Take the seeds out. Make sure they're completely dry before you store them in a sealed container (to prevent mold from growing).

That's it!


Plant Avenue Home

Are Brussel Sprouts Safe To Eat After A Cabbage Worm Infestation?

Supposedly. If you thoroughly examine and wash them, Brussel Sprouts are safe to eat even if the plant has been ravaged by cabbage worms. That's what they say, anyway.

I think I'll pass. Call me paranoid, but after reading articles such as this about parasitic infections, I'm a little leery of eating something from a plant that I know has been infested.

What a shame! I love Brussel Sprouts. I was looking forward to having them fresh and organic from my garden, instead of the ordinary store bought kind. As you can see from the first picture in this post, they're growing nicely too! Not so much in the second picture, where you can see some worm damage.

Maybe next year I'll get some nets to cover the plants and keep the butterflies off. Meanwhile I guess these plants will get pulled and tossed...


Plant Avenue Home
Planting A Rooted Rosemary Cutting

I thought I'd try planting this cutting, so I took some pics (I haven't figured out how to position them in the post the way I want yet... I'm still working on that).

For anyone who's never planted a cutting before, it's pretty easy... you simply put some potting soil at the bottom of the pot, then hold the cutting above it in the middle and scoop in more soil around it. I prefer this method to filling the pot and scooping out a hole because I find it less messy, and I end up with better results.

Fyi I use a big plastic tub with a snap on lid for my potting soil - it saves me from having to reseal the plastic bag every time I use it (I'm kind of a bugaphobe - if that wasn't a real word, it is now ;)


Plant Avenue Home

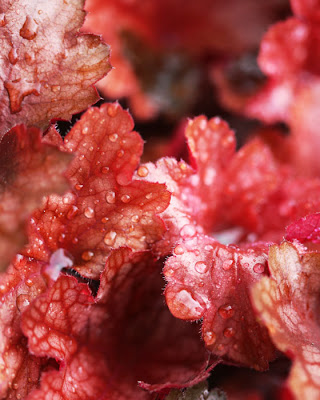
Heuchera Peach Flambe (Coral Bells)

Ahhh... red foliage!!! I have a weakness for leaves that aren't green. I have to be careful that I don't buy too many red leaf plants, because my garden could easily be taken over by the colour. (Have I mentioned how much I love Japanese Maples?)

I have a Heuchera 'Peach Flambe' (a.k.a. Coral Bells), which is thriving in my front garden. Of course now I wish I'd bought more than one ;) Not to worry... I intend to propagate it somehow. Maybe I'll try a cutting.

Here's some Coral Bells info:

  • Herbaceous Perennial
  • Saxifragaceae family
  • Zones 4-9
  • Likes full sun or partial shade
  • Not a native of BC (but thank you to whoever brought it here :)
  • Grows tiny white blossoms on tall thin stems
  • Can be propagated by division, every 3-4 years
  • Preferred soil PH 6.0-7.0
  • Size: 14" spread, 7" leaf height, 16" flower stem height
  • Spent flower stems should be removed
  • Prefers moist but well drained soil

Plant Avenue Home
Pea Rooted In Water


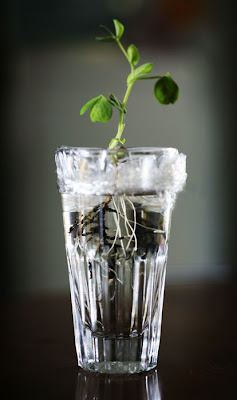
Remember this post which featured a picture of a pea I pulled from the ground that had started to sprout? I didn't have the heart to toss it in my compost tub (the poor thing is trying to live, after all ;) so I popped it in a glass of water to see what would happen. I used plastic food wrap to hold it up at the top, and put it on a sunny window sill. As you can see, not only has it grown more leaves, it's also grown new roots as well (the clean roots with no dirt on them are the ones that have grown since being in water). The only question now is what on earth do I do with it? I guess it's going to become an experimental new houseplant ;)


Plant Avenue Home

Fine Wine Weigela Florida Bramwell


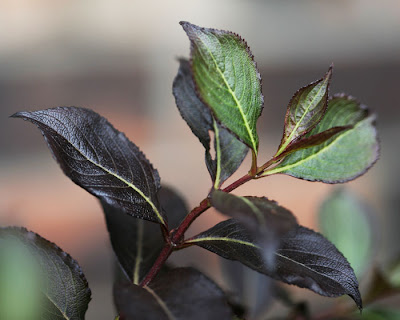
I planted my Weigela shrub in a shady spot, and as it turns out they prefer full sun (oops!). It should do well in the location I've put it, it just won't flower as much. (Note to self - research first!) It's one thing to plant an annual in a less than ideal spot because the following year you can amend this, but a perennial shrub... I suppose I could try moving it, but I don't want to risk killing it. Besides, it should be just fine where it is.

I bought it at the end of August (when everything is on sale ;) so it has no blossoms in this photograph - just beautiful rich green and burgundy leaves (love it!). I can't wait to see it in bloom, at which point I'll take more pictures.

Weigela info:

  • Deciduous (so when it loses it's leaves in the winter I won't panic ;)
  • Perennial.
  • Can be pruned after flowering.
  • Prefers well drained, moist soil, with a PH range of 6.8 - 7.7 (no coffee grounds for this plant!)
  • Attracts butterflies and hummingbirds.
  • Prefers full sun to flower more, but they will tolerate some dappled shade.
  • Cold weather hardy to -20F/-30C

Plant Avenue Home
How To Stop Cats From Eating Plants

I love my cats. I also love my plants.

Cats need to eat greens, for hairball management, extra vitamins and fibre. They prefer grass, but if they're stuck indoors they may turn to house plants instead. House plants with long slender grass-like leaves. House plants like mine! (sigh)

Since some plants are poisonous to cats, and since the plants no longer look as nice once they've been chewed on, I thought a quick review of cat deterring strategies would be useful.
  • Water bottle squirts! Having direct personal experience with this one (think "keeping my cats away from new leather couches") I know this would work for plants as well.
  • Offering planted cat grass for them to have instead.
  • Placing the plant on some plastic carpet runner with the pointy side up (ouch! aw, that's just mean ;)
  • Surrounding the plant with tin foil - cats hate the noise and feel (again I can vouch for this one, having had success with it myself).
  • Spray the leaves with vinegar (although some plants might not like this either).
  • Try creating a homemade spray with ingredients such as lemon juice (not hot pepper sauce though because this can burn the cat's eyes).
  • (Have you noticed that I haven't included "put your plant out of reach"? That's because my cat is an agile Manx who can climb and jump A.N.Y.W.H.E.R.E.) However, relocating plants might be a useful tip that would work for someone else.
So far, this time around, my cat has focused on one plant in particular, left all the others alone, and not had any ill effects from the plant she's been eating. I'm ok with that for now, but I'm glad to have some strategies in case the situation worsens in the future...


Plant Avenue Home
Stained Glass Hosta


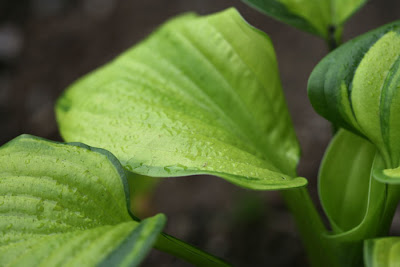
My Stained Glass Hosta is starting to bloom! I didn't think it would this year, largely because I got the plants (two of them) quite late.

Here's what I've found out about this new addition to my garden:

  • They grow in zones 3 - 9.
  • They are perennial.
  • They bloom in late summer or fall (mine bloomed near the end of September).
  • The blossoms are very fragrant.
  • They are very sun tolerant, although prefer some shade.
  • They prefer rich and moist, but well drained soil.
  • They attract bees, birds and butterflies.
  • They divide easily, and root easily in water.
  • Here's how Wikipedia defines "hosta": http://en.wikipedia.org/wiki/Hosta


Plant Avenue Home

PH Scale (My Version Of)


This chart is a work in progress, and I'm not a botanist or chemist... I put it together as a guide for myself re: my plants and how they are compatible with the soil in my garden based on some of the types of things I compost. There are a few items on there that I don't compost, such as milk, that I've included just for interest.

(If you double click on the chart you'll be able to see a larger version of it.)

I've noticed an interesting thing: I drink a lot of coffee, which is acidic, and I compost all of the grinds and filters. On the other hand, we eat very few eggs (the shells of which contain lime, which can make your soil more alkaline).

I haven't been able to grow lettuce for the past two years, and you'll notice on my chart that lettuce tends to prefer less acidic soil. My strawberry plants, on the other hand, are thriving (they apparently appreciate my morning cups of java ;)

This adds an interesting element to garden bed planning and composting. I could create two compost piles (one for coffee grinds and one without) but that complicates crop rotation (i.e. potatoes). Instead, I think the easiest thing to do at this point is to not compost all of my coffee grinds...

Oh and look where Geraniums are on the scale - they really don't like coffee!! On an impulse one day (before learning about PH) I dumped some cold coffee over the soil of a couple of geranium cuttings I have on my counter. Now they're not so happy. Oops...

Plant Avenue Home

Can You Root A Rosemary Cutting?

This is my second attempt to root a Rosemary cutting. The first time was successful, only to eventually die after it was planted in soil (not sure why - it might have been too small to survive the winter outside?).

I thought I'd try again, this time indoors. I checked my cutting today and noticed something interesting.

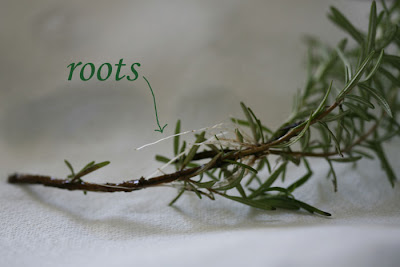
Last time the roots formed at the very bottom of the cutting, but this time the roots are growing out from where the green needles are, with no trace of roots at the bottom.

I'm curious to see how this cutting fares once I plant it (maybe tomorrow?). I'm planning to keep this one indoors over the winter. Wish me luck!

Plant Avenue Home

Saving Garden Peas For Next Year's Seeds

I purposely left my peas planted this year, long after I'd finished picking them, so that the leftover peas could dry out enough to be saved for next year's planting. (This took longer than I thought it would, as interestingly enough the pods were the last part of the plants to stay green - the plants seemed to direct most of the water and nutrients they absorbed to the pods and peas).

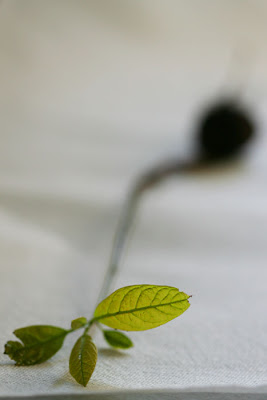
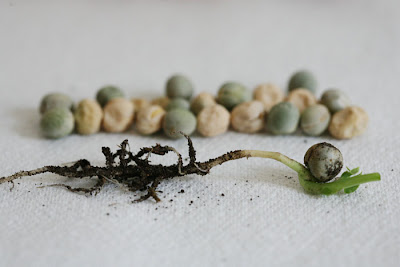
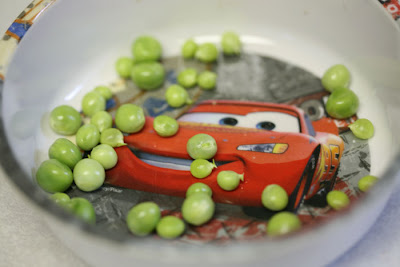
Today they were finally dry enough. I managed to find about 20 (see pic) that I can save for next year, and as I was scrounging around I pulled up what I though must have been a weed... nope! A fallen pea had started the next generation of plants already (foreground of pic).

Nature definitely knows how to take good care of things :)


Plant Avenue Home
My Asters And Other Ways To Attract Bees

A quick footnote to my last post about Asters: the bees love my new plant! I've noticed an increase in their numbers since its arrival, and every time I stop to look at the flowers, I see several bees hard at work.

This got me thinking about pollinating my fruit and veggie plants in the back yard (I planted my Asters in the front), and I thought what a shame that Asters are late bloomers. But wait, I could certainly look into other bee-attracting tips, couldn't I?

Here's what I found out:

  • Plant a variety of florals that will bloom in stages all season, that way you always have a place for bees to come.
  • Bees like a wider variety of blooms (as opposed to many of the same kind).
  • There are many herbs that attract bees (check! I have some in my garden already).
  • Provide a water source (like a small pond). Bees need water as well as nectar.
  • Do not use pesticides. I already don't, but it's still an important point (and one that makes sense).
  • Leave a portion of your garden as bare dirt (i.e. mulch and plastic free) to allow for bees that lay eggs in small tunnels under ground.
  • Leaving blooming weeds, such as dandelions, buttercups and white clover, can attract bees as well.
  • Here's a link to an article that lists good bee-attracting plants: Buzzworthy Plants That Attract Bees, by Brian Clark Howard.
The wheels in my head are turning now, generating a to-do list:
  1. Get a bird bath for the veggie garden.
  2. Plant some marigolds all around the perimeter of the veggie garden, and maybe some black eyed susans inside.
  3. Add more herbs, and spread them out throughout the garden instead of having them clumped in one area.
  4. And the list goes on...
Happy bee luring!!

Plant Avenue Home
Asters


I have yet another addition to my garden! I bought a small Aster plant recently, and now wish I'd bought two or three. I chose this colour (see picture) because it's my daughter's favourite :) Here is some information about Asters:

  • They are late bloomers, brightening up the garden in late summer and fall, and blooming until frost.
  • They attract butterflies, moths, bees, and even birds if they're left to go to seed.
  • They are perennials :)
  • If you divide your Aster plant every two or three years, it's appearance will benefit. Divide plants in the spring once they have finished blooming: remove older less healthy areas and replant the fresh, newer growth.
  • Watch out for powdery mildew: don't crowd plants, as this will prevent air circulation, and try to keep the leaves dry when watering.
  • Asters can be propagated from seeds or cuttings (at the moment I have a cutting from the plant I bought, in some water :)
  • Asters can grow in zones 4 - 8.
  • They prefer full sun.
  • "Aster" is Greek for "star".


Plant Avenue Home
Can You Grow A Japanese Maple From A Cutting?


I love Japanese Maples! We have one in our back yard, and I'd love to have one in the front as well. I hadn't even considered the option of propagating a new tree from a cutting, until I stumbled upon the idea here. I surfed around again and found more info here.

I think I'm definitely going to try. I'll have to look at our tree to see if there is any new growth I can clip to use - otherwise I might have to wait until spring.

Here's a summary:

  • Use a cutting from new growth, between 6 and 8 inches long.
  • Cut at an angle where a leaf meets the stem.
  • Remove all but the last two or three leaves.
  • Dip in a rooting hormone (such as Rootone).
  • Put cutting in moist perlite.
  • Maintain humidity (seal in plastic, or mist regularly).
  • Place somewhere with good light.
  • Once roots have appeared (about 8 weeks later), you can then move the cutting out doors, if you allow it to gradually adjust to the new temperature.
  • Plant in the ground at least a month before the first frost.

Rooting success is apparently related to the age of the tree - the younger the tree, the more likely your cuttings will be to survive. I'm not sure how old our JM is, other than the fact that it was an established tree when we bought our house, eight years ago. Hmmm. (I'm still going to try ;)


Plant Avenue Home
Nonstop Mocca Yellow Begonia

Here's another addition to my front garden! It is a Nonstop Mocca Yellow Begonia. It's a new floral for me, so I thought I'd do some research to aid in its care. Here's what I found out about Begonias:

  • They like well drained soil, as they will rot if they become too moist, but the soil should not be left to dry out completely between watering.
  • They like sun, but should be protected from the most intense sun if your climate is hot and dry.
  • Bring inside before first frost, but not into a room that's too warm.
  • When you bring them inside, start with the sunniest location you can find and then gradually allow them to get used to reduced amounts of light.
  • Zones: 3-11 (Annual in zones 3-8; Perennial in zones 9-11).
  • Tubers can be saved over the winter to start new plants the following year.
  • Leave foliage in place after blooming has finished for the season, as the leaves can continue to generate food for the bulbs/tubers. Foliage can be cut back once it turns yellow.
  • Begonias can be propagated from cuttings.


Plant Avenue Home
Mold On Zucchini Leaves

This is my latest gardening hurdle: there is powdery, grayish mold on many of my zucchini leaves. As it turns out, there are a few simple things you can try to combat this.

First and foremost - never put moldy leaves in your compost. The spores will survive and spread.

As for getting rid of mold on leaves, I was able to find three different organic solutions that can be sprayed directly on the plants to alleviate mold:
  1. Chamomile tea. Make a strong brew and let it cool first before spraying. Chamomile tea is high in sulfur and is a natural fungicide.
  2. Baking soda and water. Mix 1 tbsp of Baking Soda and 1 gallon of water and spray on leaves.
  3. Skim milk and water. Combine at a 50/50 ratio and spray on. This remedy supposedly changes the pH of the surface of the leaves, which prohibits the mold from surviving.

PS - here's a handy link http://www.ghorganics.com/page15.html with more remedies for other plant diseases (in addition to mold).


Plant Avenue Home

Cabbage Worm

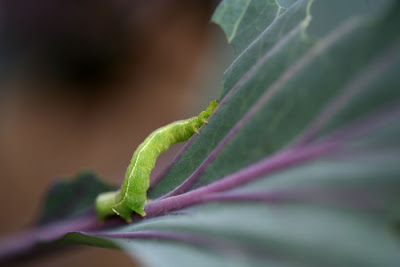
Aw, he's cute!!! Too bad he and his lil' buddies are devouring my pretty blue ornamental cabbage.

I picked off all the worms I could find yesterday, and tossed them in the yard as far away from the garden as I could (they turn into the Cabbage White butterfly so I didn't have the heart to kill them).

My edible cabbage in the back garden has also been devoured, and although I can't find any worms, I do recall seeing these lovely little white butterflies flitting about (ah-HA!).

The butterflies deposit their small eggs on the underside of the leaf. After a short time (about a week), the eggs hatch and the worms start munching away, nourishing themselves to make their chrysalis for the next generation of butterflies.

Hmmm.

I found a great article on this topic at EcoSMART, which includes a photo of the eggs, as well as several solutions including:
  • Use floating row covers and/or nylon stockings to cover your plants.
  • Remove and destroy the worms (does throwing them across the yard count? I'm thinking not, lol).
  • Plant other things to deter these pests (such as RED cabbage, Mint, Sage, Rosemary, Thyme or Hyssop).
  • Catch the butterflies with nets or sticky tapes.
They also sell their organic insectide, which is another option to try.

Another spray option, which I might try because I can mix it myself and is chemical free, is the combination of 1% garlic, 1% fish oil and 98% water. You can visit this site for more information on this.

Flour, dusted on the leaves when they're damp from dew or rain, also works. The worms eat the flour, become bloated, and die. I'm considering trying this as well, since it's a totally non-toxic option. This e-How article by Chris McLaughlin describes the flour method.

There are many things you can do to combat the Cabbage Worm - I'm planning to add to this post as I come across more information. Meanwhile, I guess I'll try one of the remedies described above and see what works!
_____________________________

PS - I just went out back and inspected my cabbage - I saw some eggs, although no big clusters of them - AND I saw some that had hatched into tiny baby worms (about 1-2 mm in length)!! Previously I had scanned for full grown worms and not seen any, but this time I looked closer...

Plant Avenue Home

Strawberry Runners Propagation


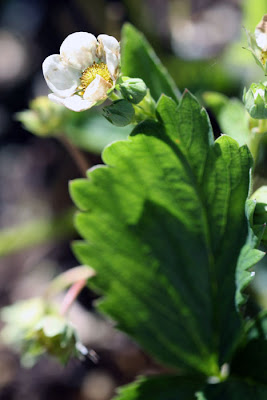
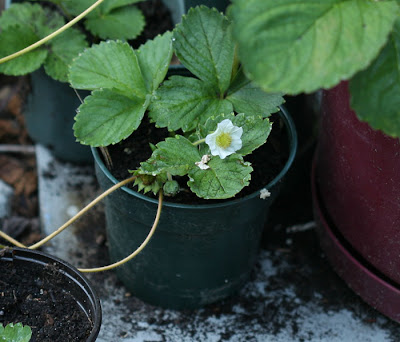
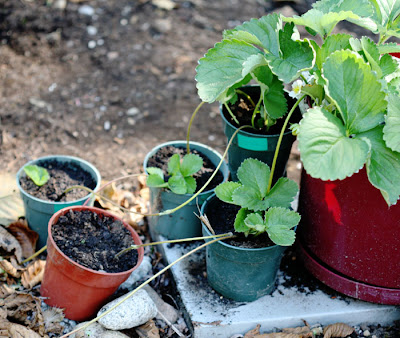
Here's an update on my strawberry runners - I tried propagating them by planting them in their own pots while they were still attached to the mother plant. Apparently it's working, because not only are they thriving, but one has even grown a blossom! All I have to do now is decide when I'm going to cut them free...

Plant Avenue Home
Shasta Daisies


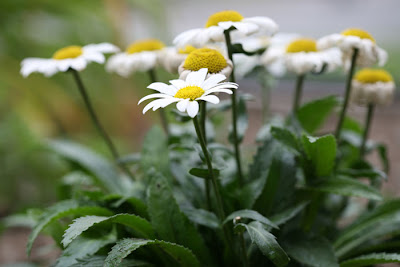
I added a new perennial to my front garden: Shasta Daisies.

I read that they are a Perennial and bought a plant without much further thought. It looks as though I made a good purchase because it turns out that they're hardy and easy to grow. Here is some information about the Shasta Daisy:

  • They can survive in planting zones 5-10.
  • They like well drained soil and full sun.
  • They are very drought tolerant, and can withstand more summer heat than many plants.
  • They attract bees, birds and butterflies.
  • Care includes deadheading (this will promote further blooming), and dividing the plant every 2-3 years.
  • They have sturdy stems, and flowers easily remain upright even after a hard rain.

So far I've deadheaded a few flowers from the plant I bought, and it continues to thrive. Hopefully it'll be a part of my garden for years to come!


Plant Avenue Home

Growing Avocado Pits

I was turning my compost pile with a shovel one day last summer when I saw what looked like a tall weed. I pulled it out from the earth only to discover it was a sprouted avocado pit! Intrigued, I planted it in a pot where it thrived, until the cold of our BC winter killed it.

I've been meaning to try growing one again, but this time with indoor potting soil so that I can keep the plant warm in the house this winter. I debated whether or not to simply fill a pot with potting soil and put the pit in it (because that apparently works!), but then I thought I'd do some Internet research on the topic.

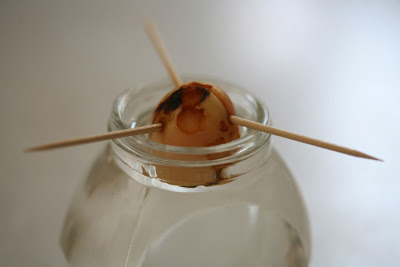
Voila! The toothpick suspension water sprouting method! (See picture).
  • Clean the avocado pit and remove the thin skin.
  • Make a slice down one side of the pit.
  • Suspend the pit with toothpicks so that the narrower part of it is above the water and the wider part is below.
  • Check water daily to ensure that the bottom half of the pit is still touching it.
  • Wait and watch!
The trick to growing avocado plants indoors is adequate sunlight - bright windows are best. I have mine on my kitchen window sill overlooking our sunny back yard.

I'll post more pics as it grows!

Plant Avenue Home

Growing Strawberry Runners


Previously I've tried cutting strawberry runners and then planting them alone, with no success. Here's a tip I heard recently that I am in the process of trying.

Before cutting the runners off the mother plant, secure them in pots and let them establish themselves in the soil, while they're still attached. Only then can you cut them free and transplant them elsewhere.

Wish me luck!

Plant Avenue Home

Are Green Potatoes Toxic?


Yes, according to Snopes, and many other sources.

The green is from chlorophyll, which is not the dangerous part, but is present along with the toxin: solanine. Large amounts of solanine consumed at one time can cause nerve damage, and smaller amounts consumed regularly can be carcinogenic.

Potato greens (leaves, stems) should never be eaten, and if you find any green on your spuds, it should be cut away, or the entire potato discarded. I found this one in my garden (see picture), and tossed it into the compost heap.


Plant Avenue Home

Harvesting Seeds From Peas

I am becoming more and more interested in obtaining my own seeds directly from the plants I've grown. My Father-In-Law has shown me how with marigolds, and when I saw these dried peas still on my aging plants (see pic), I wondered if you could with peas as well.

Apparently you can, as I read on this and many other web sites. The trick is to leave the pods on the plant until they're very dry, and then store them in an envelope until next season. You want all of the moisture to be gone, so that no mildew forms during storage.

I've taken the peas in this picture and put them away for next season... hey, you never know! And to think that in previous years I may have composted perfectly good seeds ;)


Plant Avenue Home

Eating Peas From My Garden

Kids can be picky eaters, but you never know what they'll like.

I seldom ever cook the food from my garden (except for potatoes). We normally just eat most of it raw.

My five year old son, for example, LOVES peas from the garden. I shell them and put them in a bowl for him, and he snacks to his heart's content :)

Cutting Back Lilies


My lily flowers have now died, and are ready to be deadheaded. Before heading out front with my clippers, I thought I'd do a little research on the topic.

I found out an interesting tip: if you don't cut the stems back (i.e. only clip off the top where the spent flower was), the bulbs will be better nourished and create healthier plants next season, rather than if you had cut the stems all the way back.

This is assuming the stems are still green - once they've died off and turned brown, then you can cut them as well.

Good to know!

My Good Veggie Crops This Year...


...have been tomatoes, beans, peas, zucchini and cucumber. Here's a picture of some tomatoes and beans I picked recently.

My biggest challenge with the tomatoes has been keeping them up off the ground. The plants need to be propped up, or the weight of the growing fruit will pull the branches down. (The beans require less effort to keep up because they're lighter.)

My advice to anyone who has never grown tomatoes or beans before is to plant them along the edge of your garden if it's enclosed with a fence (this is what I do, then simply tie them up against the fence). Either that or have long sticks and twine ready, or purchase plant "cages" from your local gardening store to support the plants.

While I love the Roma tomatoes and the beans from the garden, the cherry tomatoes are fabulous!! Store bought cherry tomatoes simply cannot compare. If you've considered growing them but have never tried, you should - you won't regret it :)

Potato Growing Tips

My potato crop was a little light this year, so I thought I'd give myself a potato growing refresher:
  • Rotate planting location on a 3 year cycle (you need 3 sites if you want to plant potatoes every year).
  • Allow your seed potatoes to sprout ("chitting") by keeping them in a warm, dry and dark place for a few days, before planting.
  • Cut seed potatoes into small pieces, ensuring that each piece has at least one eye (sprout).
  • Plant as soon as the soil can be worked, but warmer than 45F/8C.
  • Plant in loose soil, not too damp (good drainage), slightly acidic.
  • Potatoes like full sun.
  • Plant 3 inches deep and 12 inches apart.
  • Water early in the day so that the leaves have time to dry before the evening (if the plants stay wet they can be subject to rot).
  • Once plants have flowered and the blossoms have died, that's a sign that there are potatoes ready to harvest. Simply dig through the soil with your hands until you find them.
  • FYI - potato greens are highly toxic, and should never be eaten. The same is true of green potato skin. If you dig up some spuds that are still partially green, either cut away all the green before you eat them, or dispose of them.
Upon reviewing the above, I think what I can do next year to improve my harvest is to change my planting location. I have a very sunny spot that would be perfect! At the moment I have cucumbers and zucchini growing there, but our family eats far more potatoes. Next year that will be my new potato spot :)

Brussel Sprouts Info

This is a new crop for me: Brussel sprouts. I planted them for the first time this spring, and the plants have thrived.

Thrived, but... no sprouts! While so many other veggies in my garden have found their way to my kitchen by now, the Brussel sprouts still haven't made their appearance. Then I thought, what if they're biennial?

It turns out that they're a relatively hardy, cold weather plant, and a frost or two actually improves their flavour. They may not produce sprouts until very late in the year, sometimes waiting until the beginning of the following year.

I planted mine from seeds in the garden in late May, which means I won't see any sprouts until early 2010.

I'm glad I researched this, or I may have pulled the plants and discarded them, thinking that they had failed. Now I know they're doing fine, but not quite ready yet :)

Pollinating Strawberries, and Hand Pollination

Strawberries, while technically being self-pollinating, do benefit from some help. Many gardeners find that hand pollination of their strawberry plants produces a better yield.

There are several ways you can hand pollinate:
  • use a cotton swab, and gently wipe each flower (using the same swab for all)
  • use a soft clean paint brush and carefully brush the blossoms
  • gently shake the plant (this may not work for plants with flowers that don't have both male and female parts)
Hand pollination is commonly used in greenhouses in lieu of bees, and it's a useful tool to know about.

My strawberry plants are thriving, but as I write this, they're not producing the quantity of fruit that I would like. I have tried all sorts of things including watering more and trimming off the runners, but it hasn't really made a difference. The one thing I haven't tried yet is hand pollinating. Now I'm going to!

Pollinating Blueberries

Last year I bought two small blueberry bushes, which both had flowers at the time of purchase. I brought them home and planted them on either side of our considerably large yard, thinking I'd end up with better spacing that way. The flowers, which had already been pollinated, turned into berries, and I thought the plants were doing well.

This year, one of the plants has died, and the other, while still very healthy, has not produced flowers OR fruit. What I'm learning now is that blueberry bushes are not self-pollinating, and need to be planted close to each other so that they can cross pollinate. While blueberries have both male and female parts, they are self-sterile and cannot be pollinated from their own pollen.

Bees are important for blueberry pollination, and they prefer warm sunny weather. Next spring I plant to purchase more plants and put them within close proximity of each other, in a sunny, bee-friendly location. Hopefully this will produce better results!

Pollination Terminology

Pollination is a fairly involved topic that I am just beginning to learn. Here is some basic terminology:

Male flowers: produce pollen and have only male parts (stamen, anther, and filament).

Female flowers: produce fruit and have only female parts (pistil, stigma, style, ovary, ovule).

Imperfect flower:
a flower that has either all male parts or all female parts, but not both.

Perfect flower:
a flower that has both male and female parts.

Self pollination:
refers to the transfer of pollen from the male flower parts to the female parts of the same flower.

Wind pollination:
pollen that is transferred to other flowers via air currents over a long distances.

Cross pollination:
pollen that is transferred, mainly by insects, between flowers.

Self sterile:
a plant that cannot be pollinated by its own pollen.

Self fertile:
a plant that can be pollinated by its own pollen.

Ripening Tomatoes


Tomatoes taste best when they're ripened on the vine, but sometimes there isn't time before the first frost in the fall. This happened to me last year - we had such a short growing season that most of my cherry tomatoes were still dark green when the temperatures started to drop.

I googled the topic and discovered that you can ripen green tomatoes by bringing them indoors and placing them in the dark, somewhere cool. I thought I'd try, and took a large plastic container, lined it with paper towels, and spread out the tomatoes. I then covered them to keep the light out and waited, checking on them every couple of days.

Voila! Success. I discovered something interesting, too... if I took out ALL the ripened tomatoes, it took longer for new ones to ripen than it did if I left a few ripe ones in the tub. It turns out that ripe tomatoes produce Ethylene, which accelerates the ripening process for the others. Supposedly ripe bananas have the same effect on green tomatoes, although I haven't tried that one.

Here are some other tricks to speed up the tomato ripening process (these ones I haven't tried yet):
  • shock the plant by yanking on the root
  • cut back on watering
  • pull the entire plant and hang it upside down
This year we're having a much warmer summer so I've been letting my tomatoes ripen on the vine, but it's nice to have some tricks up my sleeve for the future :)

Growing New Plants From Old, Without Buying New Stock

My Father-In-Law bought marigold seeds once, years ago. He plants them every year in our garden but he uses seeds from his own previously grown flowers. He showed me today how he gets the seeds from the flowers - it was far more simple than I had thought.

Marigold Seeds:
  • take an old, drying marigold blossom, and remove the outside petals.
  • pull the seeds out from inside the base of the flower.
  • Once you remove the seeds, leave them out to dry before putting them away for use next season.

My Father-In-Law usually plants his in June (we're in Zone 8). He even showed us an ice cream bucket full of seeds he has stashed from last year.

He has also grown tomato plants from seeds taken from a store bought tomato, by simply removing them from the fruit and inserting them in the soil, without drying them or doing any other prep first. I haven't tried that yet, but I plan to!

Potatoes are one of the easiest foods to grow from your grocery cart - I've done this many times myself. You simply select a few potatoes with eyes sprouting, cut them in pieces ensuring that each piece has at least one eye, and bury them in the soil. They can take over your garden though, so watch out ;) They also can come back year after year, if any potatoes are not harvested and left in the soil.

One day I was turning the soil in my compost pile and I found an avocado pit that I had composted which had sprouted a new plant. I transferred it to my garden and watched it grow, only to have it die over the winter. I wonder now if I had brought it indoors, would it have survived?

What about you - what's your experience with growing new food and flowers from old?

Clip art courtesy of www.artvex.com

Search Amazon.ca For Gardening Books

Search Amazon.com For Gardening Items

Planting Zones Explained

Planting Zones are weather regions determined by the lowest recorded temperatures for that area. They are used in gardening to rate plant and climate compatibility.

A numbered scale is used: the lower the number, the colder the region and the hardier the plant required. Knowing which zone you are in enables you to select plants that will thrive in your garden, rather than struggle in an incompatible climate.

Here is a link to a website that talks about planting zones. If you scroll down the page, there is a handy chart that summarizes the zones by temperature:
http://www.lawn-and-gardening-tips.com/planting-zones.html

Here are more helpful links as well:

http://atlas.nrcan.gc.ca/site/english/maps/environment/forest/forestcanada/planthardi
http://www.veseys.com/ca/en/learn/reference/hardinesszones

Annuals, Biennials, and Perennials Explained

Annuals are plants that live for only one season, and produce the next generation from seeds. Annuals germinate, flower and die all within one year.

Biennials have a limited life span as well, although they last longer than Annuals. The complete life cycle of a Biennial is two years. Flowering may occur only in the second year, as many Biennials require a cold weather dormant period (called vernalization) before they bloom. At the end of their life cycle in the second year, they produce seeds to start the next generation.

Perennials live for longer than two years. They grow and bloom in spring and summer. and then in the fall and winter die back. They begin growing again in the spring from their root stock.

Previous Posts: